There are many best practices you should follow as a website administrator or someone who manages and maintains your own website. We won’t dive into all of those best practices in this article, but we will cover how to optimize and repair your MySQL database in phpMyAdmin.
In today’s landscape, many web-based applications use MySQL. MySQL has grown to become the leading database for web-based applications because of it’s proven reliability, performance, and on-demand scalability. On top of that, it’s Open Source as well as owned and supported Oracle!
- Backing Your Website’s Database
- Benefits of Optimizing & Repairing Your Database
- How to Optimize & Repair Your Database in phpMyAdmin
Backing Up Your Website’s Database
Before making any changes to your database, it’s always a best practice to backup your database in case something does not go as planned. You can backup your database using SSH or through phpMyAdmin (Linux environments). In this article we’re going to keep things simple and show you how to backup (export) your database through phpMyAdmin.
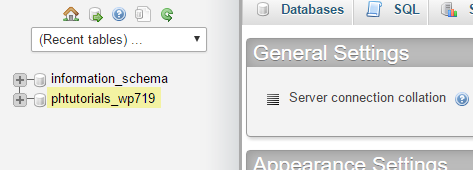
You’ll want to log into your cPanel control panel and locate the phpMyAdmin icon under the Databases heading. When you click this icon it will automatically redirect you to phpMyAdmin’s interface in your browser. You’ll be able to identify your existing databases in the left hand column. If you’ve installed applications on other addon domains or subdomains you may see more than one database in the left column. You’ll need to make sure to identify the correct database.
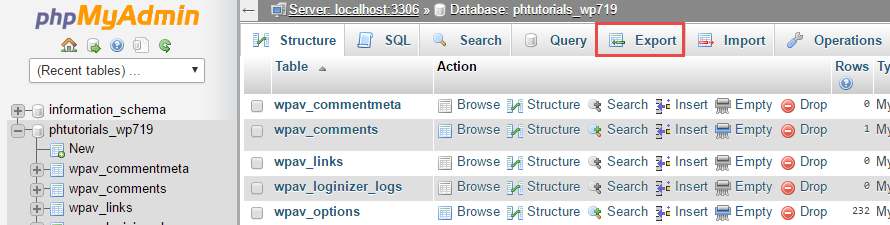
Now that you’ve selected your database in the left hand column you’ll want to find the Export button in the top navigation bar.
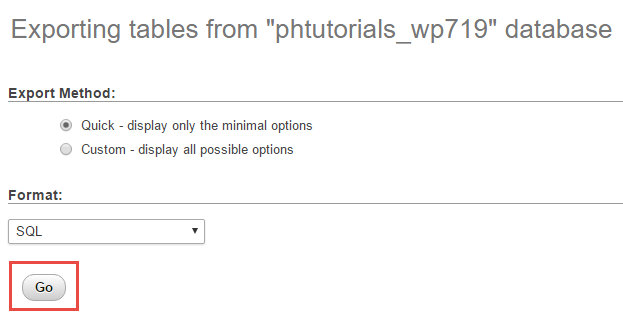
After clicking the Export button you will be taken to another page. By default, the Export Method selected will be Quick – display only the minimal options and the Format selected will be SQL. Keep these options as they are and hit the Go button.
You’ll be prompted to download a .sql file (your database) locally onto your computer.
You have now successfully backed up your website’s database.
Benefits of Optimizing & Repairing Your Database
If performance if something on the top of your mind then you’ll be happy to hear that MySQL was designed to support the needs of the most demanding applications. Your website’s application (e.g., WordPress, Joomla!, Drupal, PrestaShop, OpenCart, etc.) performs a lot of tasks under the hood to keep your site functioning the way it does. At a high very high level, when a new comment is made on your blog post a table (or multiple tables) in your database will be updated with information. When you delete a spam comment, that information is deleted from your database table(s). Essentially, your website is working with MySQL to store and retrieve data from your database.
To understand or visualize what a database is, think of a database as if it were a bookshelf. When a new book is added to the bookshelf, it stores that book (information or data). When it is removed from the bookshelf, the area that book occupied on one of the shelves is now empty and can be filled by other books.
Overtime your website has handled, stored, and retrieved a lot of information and data. Your database tables could get messy for various reasons such as from poorly coded plugins, modules, templates, and themes.
A poorly maintained database can, and most likely will, experience a decrease in performance. When you optimize your MySQL database, MySQL will create temporary tables of your original tables, delete the original table, and rename the temporary table to take place of the original table that was deleted.
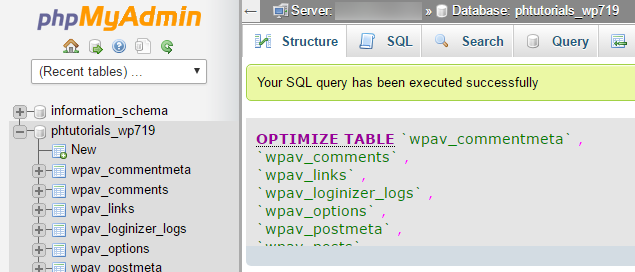
During the optimization process on your database and tables, MySQL locks each table during the optimize table process and reclaims the unused space and defragments the data file. “After extensive changes to a table, this statement may also improve performance of statements that use the table, sometimes significantly.”
After optimizing your database’s tables, you’ll want to repair your database’s tables. Repair table repairs any possible corrupted tables. Follow these steps below to optimize and repair your MySQL database in phpMyAdmin.
How to Optimize & Repair Your Database in phpMyAdmin
You’ll want to log back into cPanel and navigate to phpMyAdmin just as you did earlier in this article to backup your database.
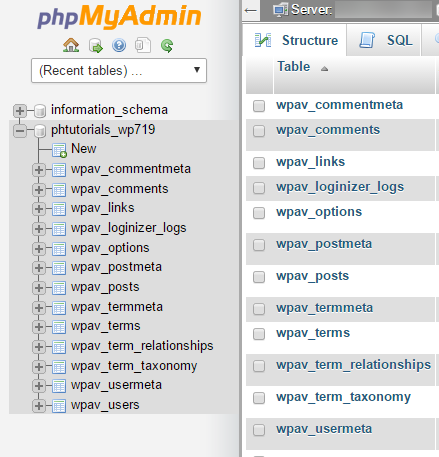
After going into phpMyAdmin and identifying your database, in this example it’s phtutorials_wp719, you’ll want to click the ‘+’ symbol next to the name. This will expand your database and reveal the database tables. Next, you’ll want to click your database name. Clicking on your database name will highlight all of the tables in your database.
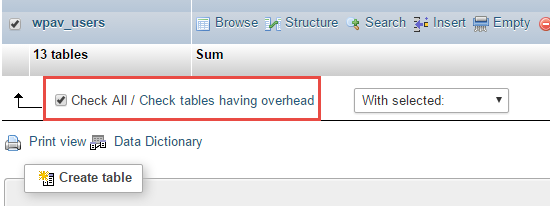
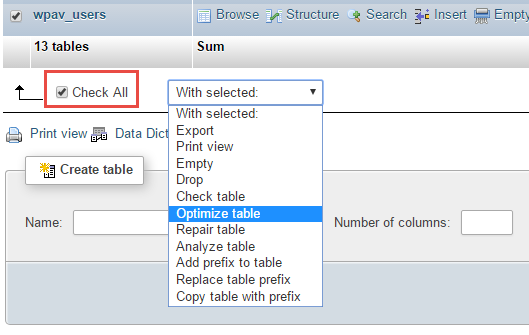
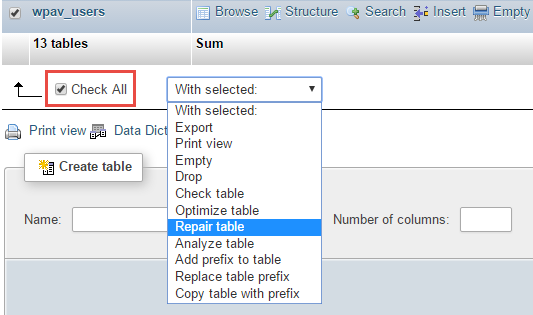
Next, you’ll want to check the box for Check All / Check tables having overhead and choose Optimize Table from the drop down menu.
Now that you’ve optimized your table you’ll want repair your table by going through the same process.
Now that you’ve optimize and repaired your database you’ll most likely notice that the size of your database has decreased–this is a good thing!
It is worth noting that if you’re running through this process in hopes to fix your website’s performance issues, this is just one of many steps you can take to troubleshoot your website’s problems. If your site is continuously suffering from performance issues and causing high server load / CPU usage there’s most likely something else going (persistent connections, abusive processes, etc.).
If you have any questions on how to optimize and repair your MySQL database please contact support for assistance.