Installing scripts and applications through Softaculous is a very straightforward process. Softaculous is an auto-installer widely used and integrated into cPanel, made available to customers through many web hosting providers. Through the Softaculous interface you will have access to over 419+ OpenSource scripts and applications, which can be installed with the click of a button.
This gives you the ability to install the most popular scripts and applications such as WordPress, Drupal, Joomla!, PrestaShop, OpenCart, Magento, and AbanteCart just to name a few, without any technical background in creating databases, assigning database user privileges, and going through a manual installation process for a particular script or application.
If you have a Linux based hosting account at PeoplesHost, you will have access to Softaculous in your control panel (cPanel).
In this articles we’re going to walk you through the steps on how to access Softaculous and how to install a script or application through Softaculous.
Locating Softaculous in cPanel
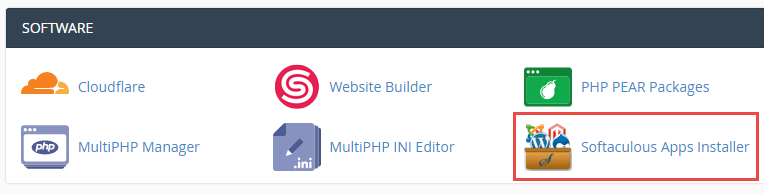
After signing up at PeoplesHost, a Welcome email will be sent to your email address on file with your hosting account details. This Welcome email will contain the URL you will need to log into and access cPanel. Once you’re logged into cPanel, search for the SOFTWARE section. In this section you will see an icon for Softaculous Apps Installer. Clicking this icon will take you into the Softaculous interface.
How to Install a Script or Application
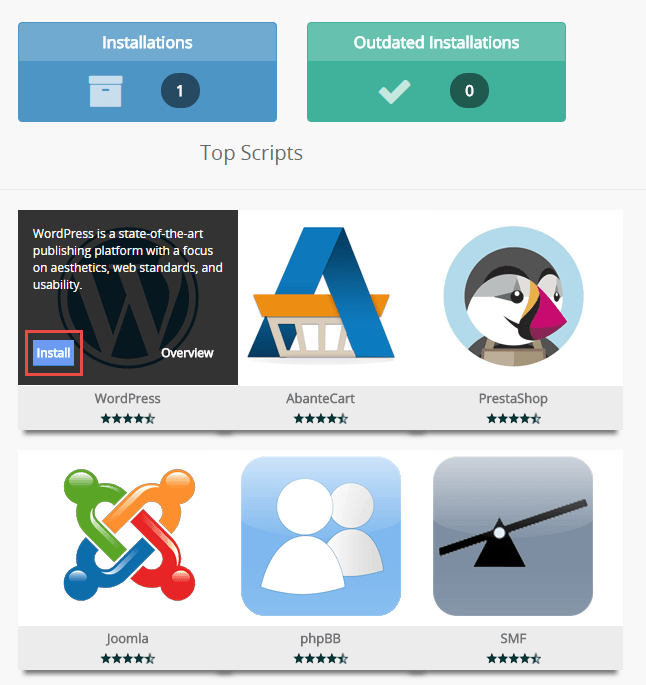
Now that you’re inside of Softaculous you’ll notice a lot of options to choose from. On the main dashboard you should see the Top Scripts listed with larger icons in the middle of the page. In the left side navigation, you’ll see categories you can browse to search for a script or application that fits the criteria of what you’re looking for.
For example, if I want to sell products online I would navigate to the E-Commerce category. Once that category is clicked it will expand with all of the eCommerce solutions available to install through Softaculous.
In this article we’re going to install the popular CMS (Content Management System) called WordPress. Simply click the Install button and you will be taken to the WordPress installation page.
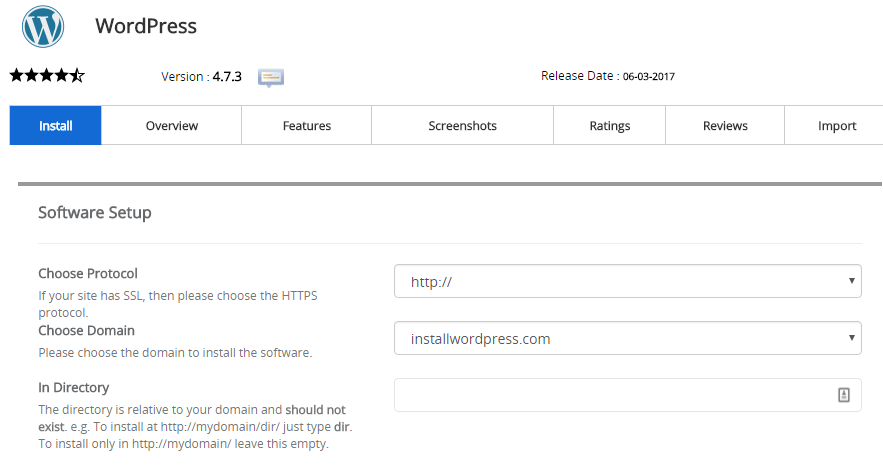
On the installation page you’ll want to choose the settings and configure your installation of WordPress.
Note: If you do not have an SSL Certificate installed for your domain you will want to choose the protocol http:// or http://www. from the Choose Protocol dropdown menu.
Leave the In directory field blank if you wish to install WordPress on your root domain. If you choose to install WordPress into another directory (e.g., blog) then you will access your WordPress site on yourdomain.com/blog instead of your root domain yourdomain.com.
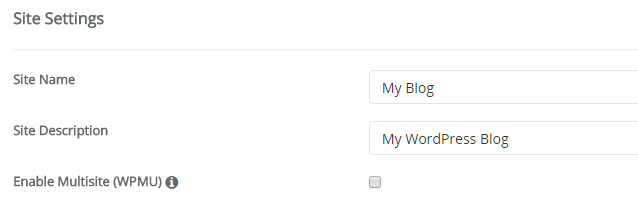
The next section is Site Settings. Don’t worry about changing the Site Name or Site Description. You will be able to edit this in your WordPress dashboard in the General settings later on if you’d like.
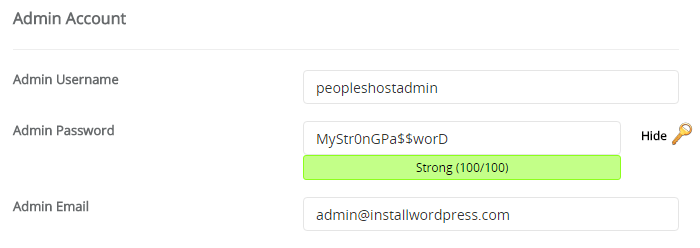
In the Admin Account section, it prefills your Username as adminand Password as pass.
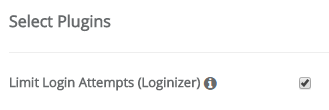
You can also choose to enable the Limit Login Attempts (Loginizer) WordPress plugin. By default, this is not checked. If you take security seriously, we recommend checking the box for the Limit Login Attempts plugin.
If your site is getting attacked or someone fails to log into your site with the correct credentials 3 times, they will be restricted from attempting to log into your site for a time period that you can set in the plugin settings.
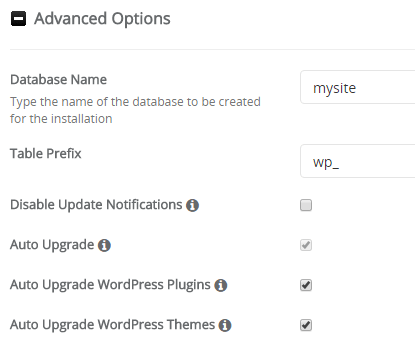
Expanding the Advanced Options will allow you to change things such as the database name, table prefix, and enable or disable update notifications, WordPress plugin updates, and WordPress theme updates.
If you’d like to know when your WordPress core files, themes, or plugins are updated (it’s always good to know just in case an update causes any issues) then keep the Disable Update Notifications box unchecked. To keep your site up to date, we recommend checking the options for auto upgrade on both your plugins and themes.
You’re almost done! Just click the blue Install button at the bottom of the page.
Softaculous will run the installation and provide you with the login URL for your site. You’ll want to use the username and password you selected above to log into your site to begin creating your website and publishing your content.