We’ve previously walked you through the steps on how to install a script or application using Softaculous. In particular, we used WordPress as an example for that posts step by step guide. Occasionally, we have customers ask us how to install WordPress manually. We’re going to show you the proper steps to install WordPress manually on your hosting account. Once you are familiar with this process, it shouldn’t take any longer than 5-10 minutes to setup and install WordPress on any web hosting account.
- Download the Latest Version of WordPress from WordPress.org
- Upload the WordPress package (.zip) into Your Site’s Directory
- Create Your Site’s Database
- Create Your Site’s Database User
- Run the WordPress Installer
1. Download the Latest Version of WordPress
If you’re reading this post, you’re probably familiar with WordPress. For those of you who aren’t, there are two versions of WordPress; WordPress.com as a hosted platform and WordPress.org as a self-hosted application. What you’re interested in is the WordPress.org (self-hosted) version of WordPress. This allows you full control of your site’s files on the hosting environment of your preference.
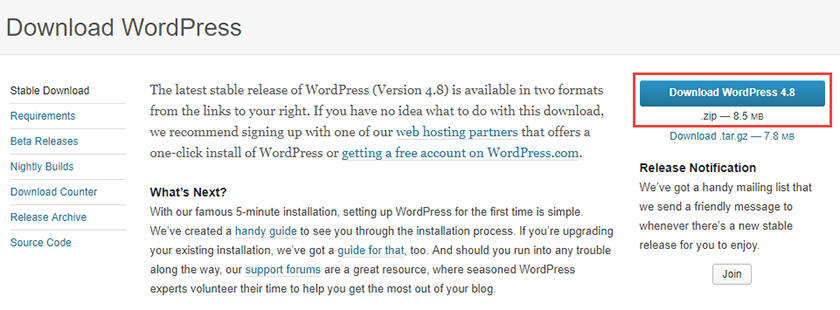
To get started, you will need to get your hands on the latest version of WordPress. You can download the latest, stable release of WordPress by accessing this URL – https://wordpress.org/download/ and clicking the Download WordPress button. You will then be prompted to save the WordPress package (.zip file) to your computer or device.
2. Upload the WordPress package (.zip) into Your Site’s Directory
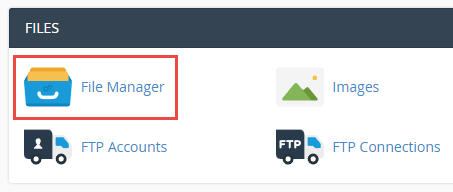
If you have a brand new hosting account with cPanel control panel, you’ll want to log into cPanel and navigate to the File Manager. Once you find the File Manager icon, click it and the File Manager will open in a new tab inside of your browser.
File manager will look something like the next image below. You’ll most likely be taken to the home directory. Assuming you would like to install WordPress on your hosting account’s primary domain, you’ll want to double click the public_html directory to be taken inside of that directory.
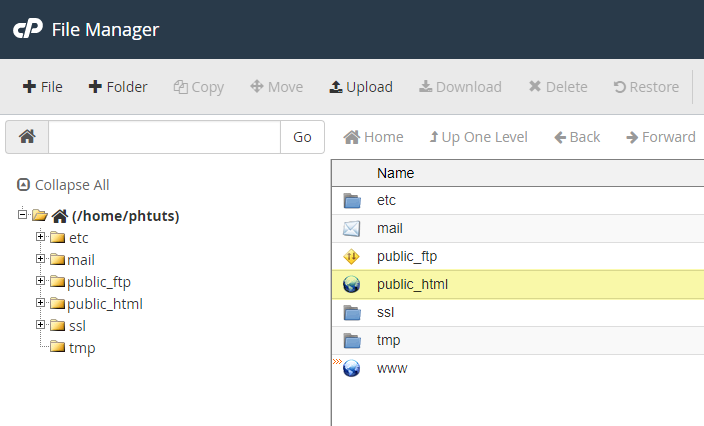
NOTE: If you’re trying to install WordPress on an addon or subdomain, you’ll want to look for that domain’s directory. That domain’s directory may be sitting in your home directory or it may be sitting in your public_html. It depends on what you have that particular addon or subdomain’s document root set to inside of cPanel when you first added it to your account.
For this walkthrough, we’re going to continue to assume you want to install WordPress on your primary domain inside the public_html.
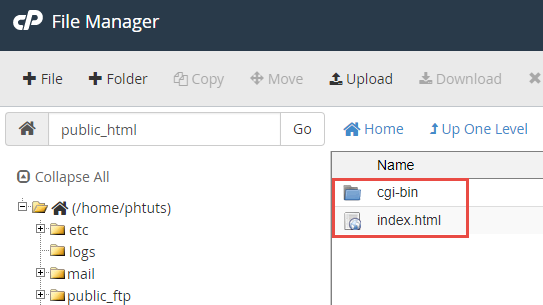
Once you’ve clicked through to your public_html you may notice a cgi-bin directory and index.html file. We create these on your account by default. You may delete those from your public_html.
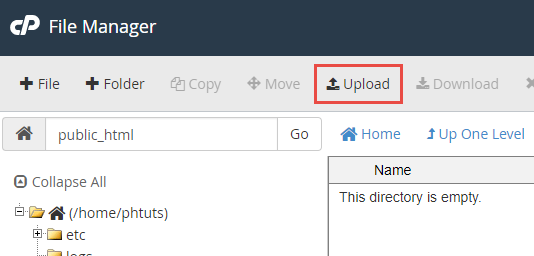
Now that you’re inside of your public_html directory, you’ll want to upload the WordPress package you downloaded in step 1 of this walkthrough. Click the Upload button inside of File Manager. This will open a new tab and ask you to select the file you wish to upload.
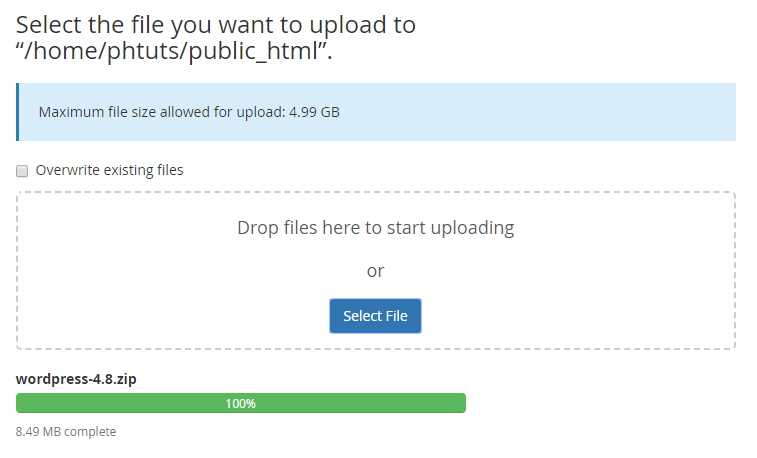
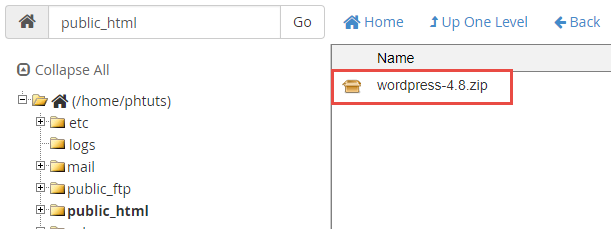
Next, you’ll see that the .zip package is sitting inside of your public_html directory. Click the file to highlight inside of File Manager and click the Extract button.

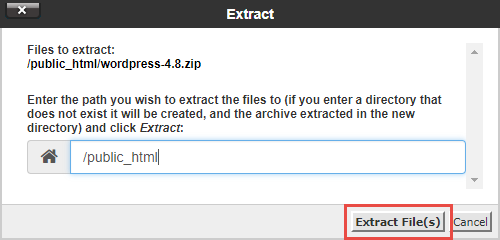
WordPress.org packages the files in a wordpress directory. You’ll see this folder sitting in your public_html after you’ve clicked the extract button from the previous step. Unless you want visitors to access your site at www.yourdomain.com/wordpress/, you’ll want to move the files from the newly extracted wordpress directory into your public_html.
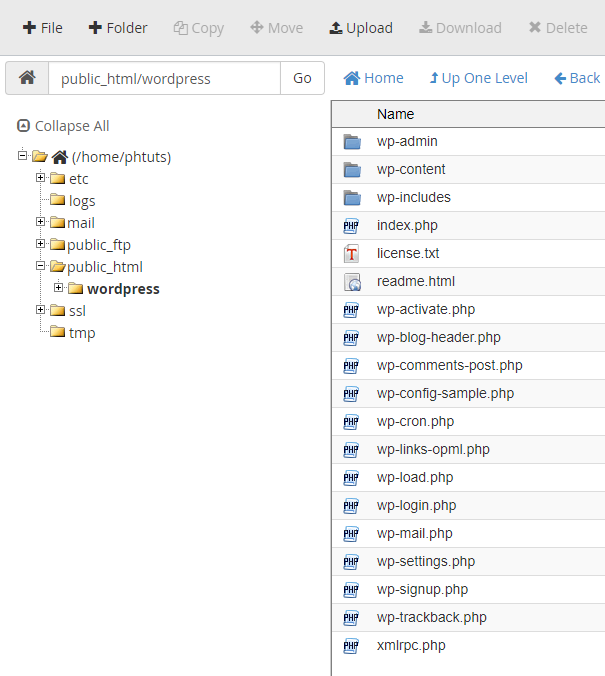
Click into the wordpress directory. You’ll see all of the WordPress core files and directories listed inside of that folder:
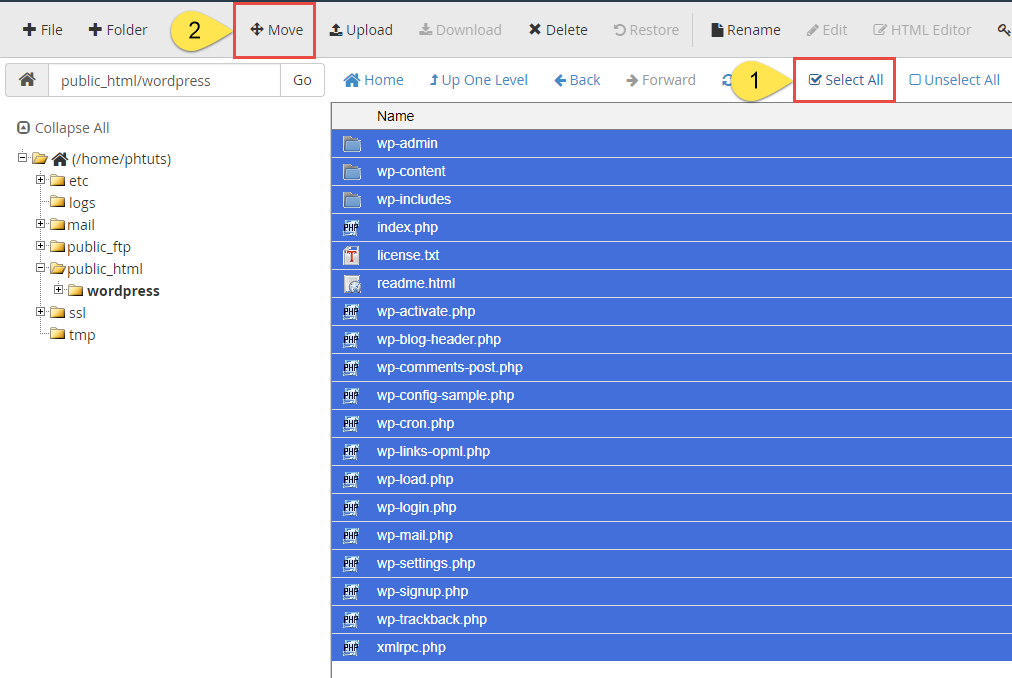
To move these into your public_html, click the Select All button at the top and then click the Move button. A Move screen will appear. Make sure to scroll down and edit the path you want to move the files into. In this example, you’ll want to delete /wordpress from the page so the files will be placed into the /public_html/.
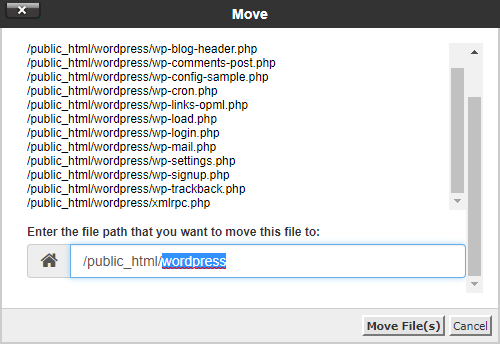
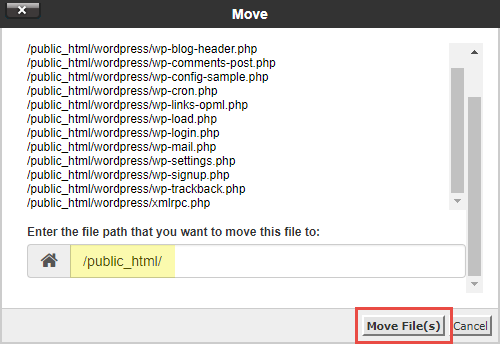
You have now successfully moved the WordPress files back into your public_html. You can delete the (now empty) wordpress directory and the .zip file you uploaded.
3. Create Your Site’s Database
To install WordPress you’ll need to make sure to create a database, database user, and database user password. You can do so by logging back into cPanel and locating the MySQL Databases icon under the DATABASES heading.

Create a new database for your new WordPress site. You can name the database anything you’d like and hit the Create Database button.
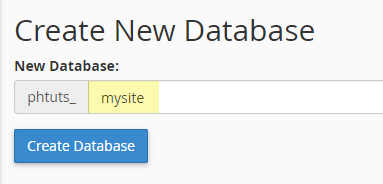
Now you need to create a database user to assign to the database you just created.
4. Create Your Site’s Database User
Scroll down on the page to the Add New User section. In this walkthrough, we’re going to name our user admin.
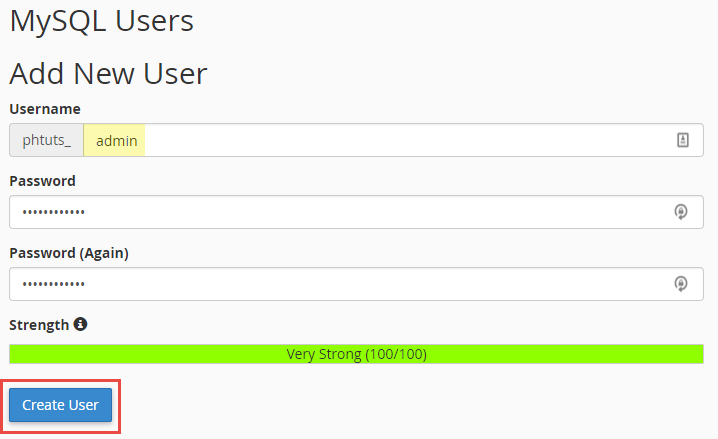
Next, you’ll assign your newly created database user to the database you created at the beginning of this step. Scroll down to the bottom of the page and you’ll see a section with heading Add User To Database. Choose the User you just created from the drop down menu and choose the Database you just created from the second drop down menu. Click the Add button.
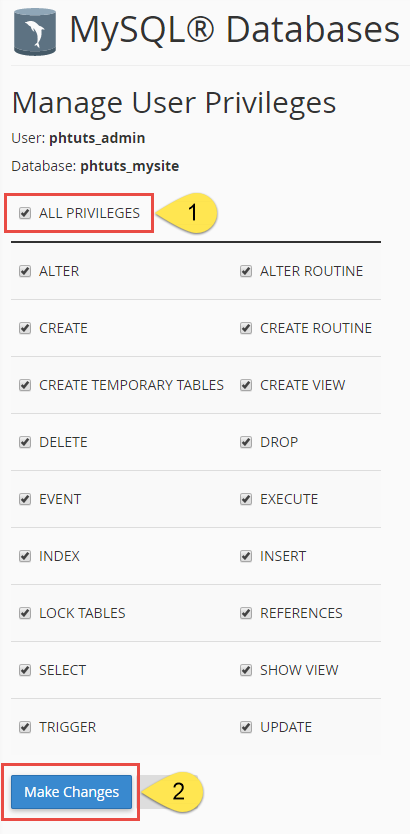
A new page will load. This is where you assign privileges. You’ll want to assign ALL PRIVILEGES. Click the checkbox for ALL PRIVILEGES and hit the Make Changes button at the bottom of the page.
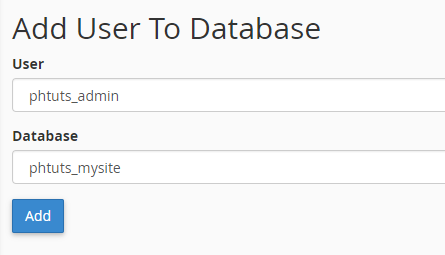
If you assigned privileges correctly, you should see this on the MySQL Databases page (or something similar since your username and database name/user is different:

Now that both the database and user are created and user is assigned the proper privileges, you can run the WordPress installer.
5. Run the WordPress Installer
Make sure that your domain name is pointing to the correct nameservers. If you haven’t updated your domain’s nameservers and have your domain registered at PeoplesHost, you’ll want to follow these instructions to update your nameservers.
When your domain name is resolving to the correct nameservers, open a browser and go to (replace yourdomain.com with your actual domain name):
http://yourdomain.com/wp-admin/install.php
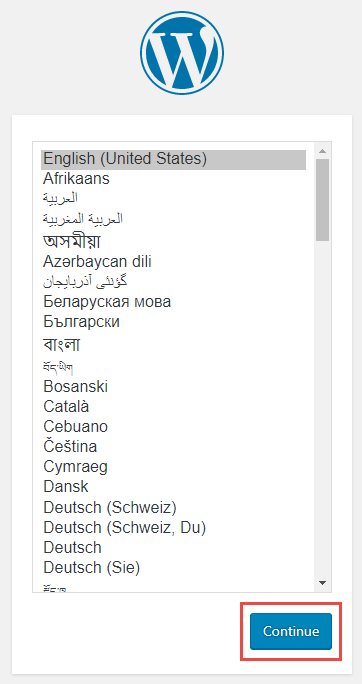
This will bring up the WordPress setup config page where you’ll select your language and hit the Continue button:
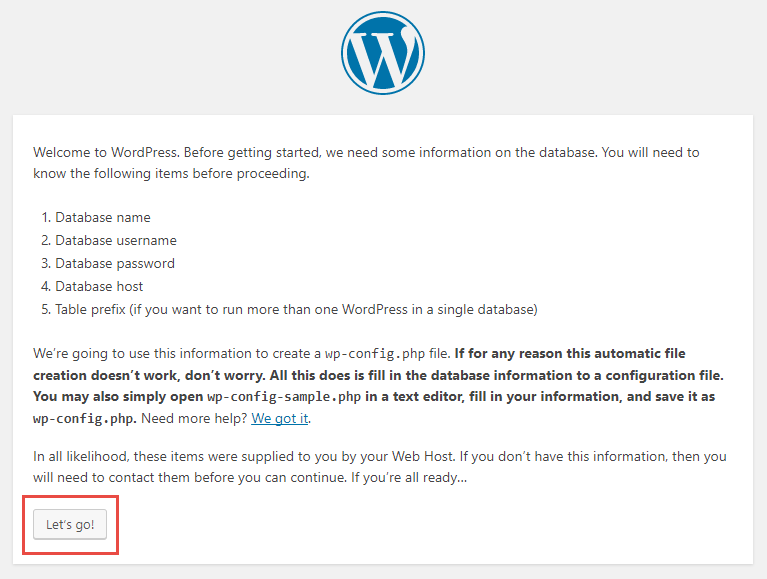
The setup wizard will now inform you that it will need the database information you created in the previous steps. Click the Let’s go! button.
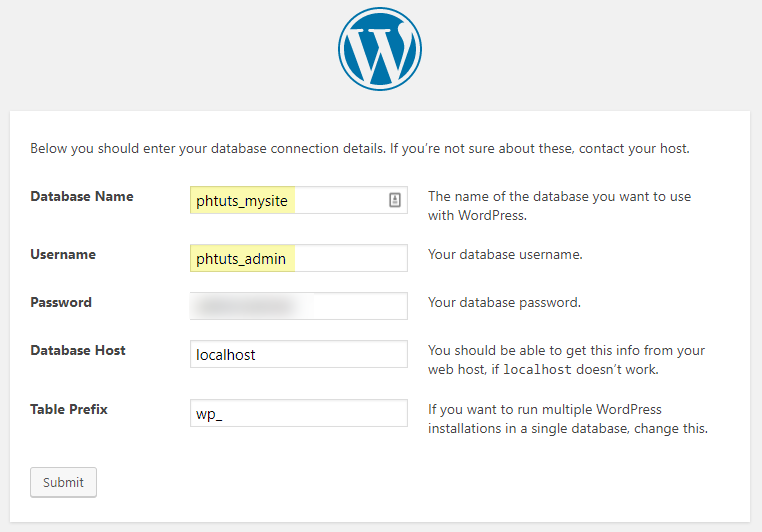
You’ll be asked to fill in the following information. Click the Submit button when completed. This information must be correct and match exactly with the database name, user, and password you created earlier.
- Database Name
- Username
- Password
- Database Host
- Table Prefix
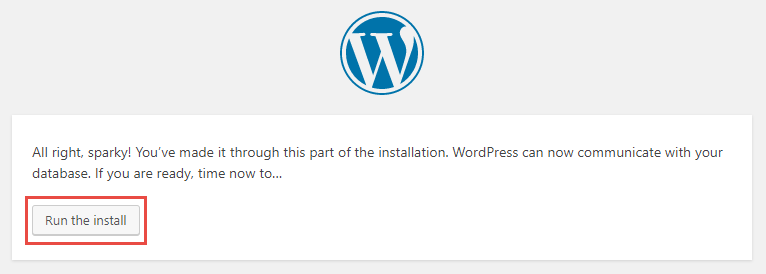
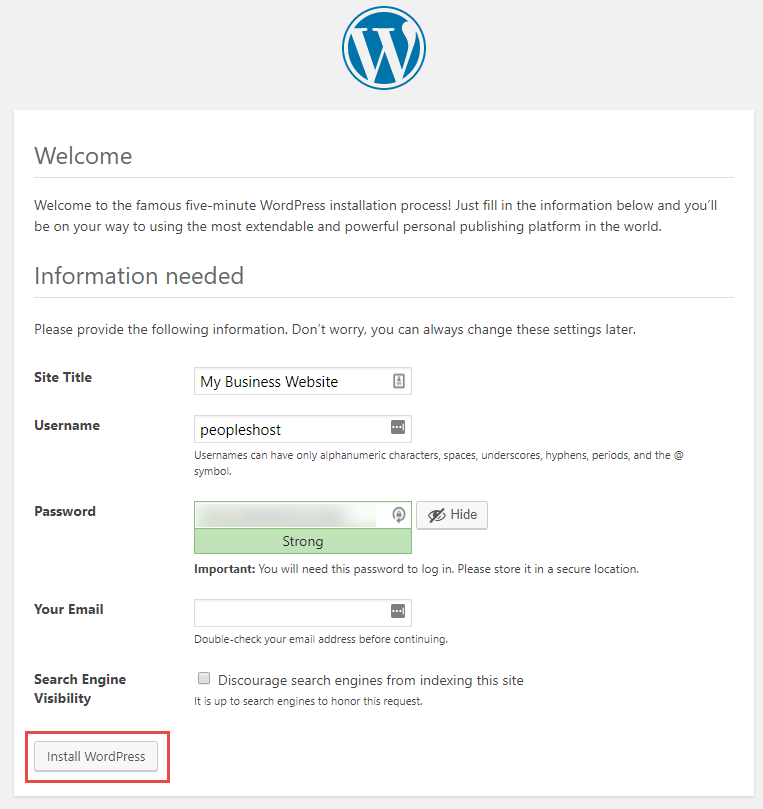
If all of your information is correct, you’ll be taken to the next page. On this page, click the Run the install to continue with the installation process. On the next page, you’ll be asked to fill in your Site Title, Username, Password, and Email Address. Click the Install WordPress button at the bottom when you have filled everything out.
After you hit the Install WordPress button, you’ll see a Success! page. You’ve successfully installed WordPress the manual way. You can now log into your WordPress website/blog with the username and password you created by going to either of the two URLs:
- http://yourdomain.com/wp-login.php
- http://yourdomain.com/wp-admin/
If you’re new to WordPress we’ve put together some beginner video tutorials that may be of help to get you familiarized with the WordPress dashboard. You can view those video tutorials in our knowledgebase.


