
For many reasons, you may be looking to create a new FTP account for someone other than yourself. Most commonly for a developer, agency, colleague, or any third-party who is requesting access to your site’s files. It’s understandable that you may not feel comfortable giving a third-party access to your whole file system.
Creating a new FTP Account for a third-party inside of cPanel is a fairly easy task. In this article we’re going to walk you through the steps on how to create an FTP account in cPanel and make sure the new FTP account only has access to files inside of a specific directory/folder that you grant access to.
- Manually Create FTP Account in cPanel
- Providing the Correct FTP User Credentials
- Assign Directory to FTP Account
- Connect Using a File Transfer Protocol (FTP) Client
1. Manually Create FTP Account in cPanel
To get started, you’ll need to make sure you have your cPanel username and password. If you don’t have this information on hand and you’re a PeoplesHost customer, you can obtain your cPanel username and password inside of the Welcome email we sent to you when you first signed up.
Here’s a knowledgebase article that walks you through the steps on how to access your past email notifications from our billing system.
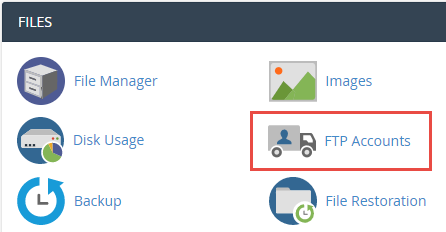
Log into cPanel and locate the FILES heading. Under this heading you should see a FTP Accounts icon.
On the next page, you’ll want to fill out the required information for the new FTP account you wish to create. In this example, we’re going to create am FTP account with the following information below. This will give the new FTP account access to the entire public_html directory.
- Log In: Username for the new FTP account
- Password: Password for new FTP Account
- Directory: The folder this FTP account will be able to access
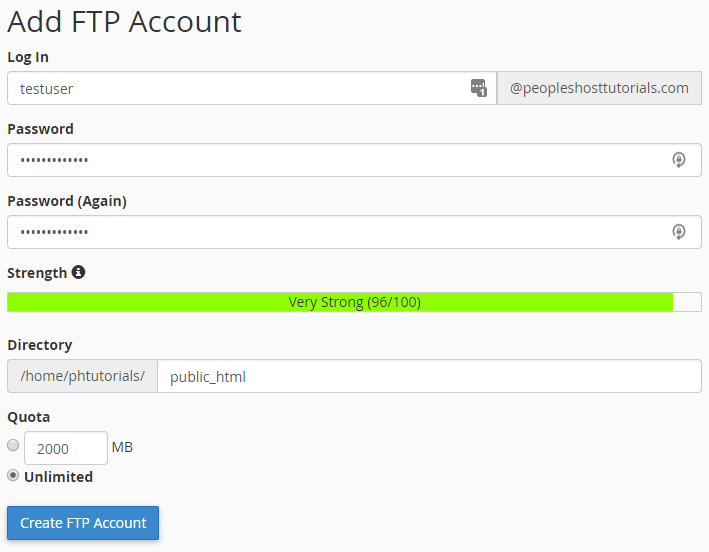
Click the Create FTP Account to complete adding the new FTP account inside of cPanel. You’ll see a success message Account Created appear on the page.

2. Providing the Correct FTP User Credentials
By default, every cPanel account has a default FTP Account that’s created for you when you. This information is also included in the Welcome email we sent you after signing up for web hosting services.
Inside of cPanel you’ll see this default FTP account at the bottom of the page in the FTP Accounts section you navigated to earlier:
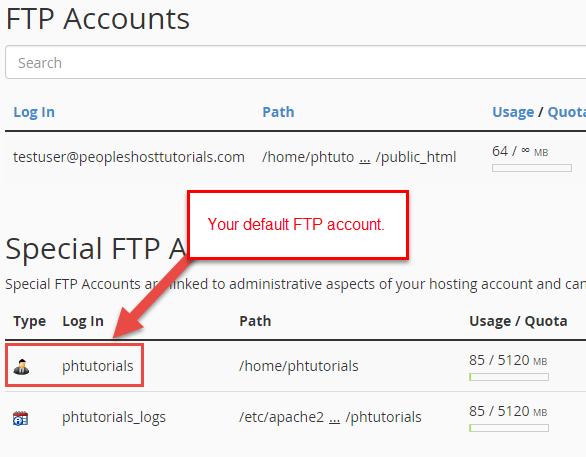
Since you’ve just created a new FTP user account, you will need to make sure to provide the third-party you’re giving access to the correct FTP user credentials. Your default FTP Account username will be one word, typically the same word matching your cPanel username. For example, your cPanel username and FTP username might be ftpuser.
In the example above, we created an FTP account for testuser inside of cPanel. Since this was a manually added FTP account you will need to make sure to provide the third-party with [email protected].
Using this example, the full username your third-party would want to use when connecting via any FTP client would be [email protected].
3. Assign Directory to FTP Account
When you add a new FTP account inside of cPanel it will auto-fill the Directory section with /domain.com/username. This will simply create a new directory the new FTP account has access to, which will have no files.

If you’d like to give the new FTP account access to the public_html, you would want to make sure to create the new FTP account with the following Directory path:

Let’s say you don’t want to give access to your entire public_html. Instead, you’d like to give access to the blog directory that’s inside of your public_html. You would want to make sure to update the Directory path to:

4. Connect Using a File Transfer Protocol (FTP) Client
Now, we’re going to show you how to connect to your hosting account with an FTP client, FileZilla, using the newly created FTP Account from the previous step. You’ll want to test connecting to this FTP account to make sure it connects successfully and that you’ve given access to the correct directory of files for the third-party.
If you don’t have FileZilla or haven’t used an FTP client, you’ll want to take some time to view our knowledgebase article on how to connect to FTP with FileZilla.
Open FileZilla and click File > Site Manager. A pop-up will appear that looks similar to the image below. Click the New Site button.
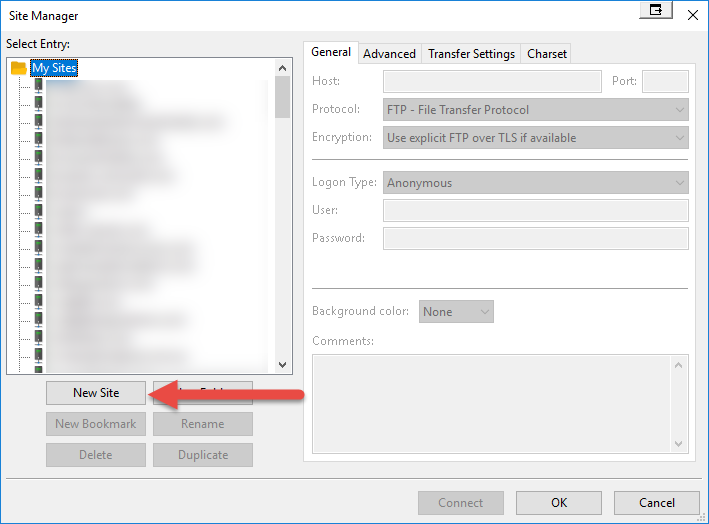
- Host: Your server’s hostname (this can be found in your Welcome email)
- Protocol: FTP – File Transfer Protocol
- Encryption: Use explicit FTP over TLS if available
- Logon Type: Normal
- User: Your newly created FTP Account
- Password: Your new FTP Account’s password
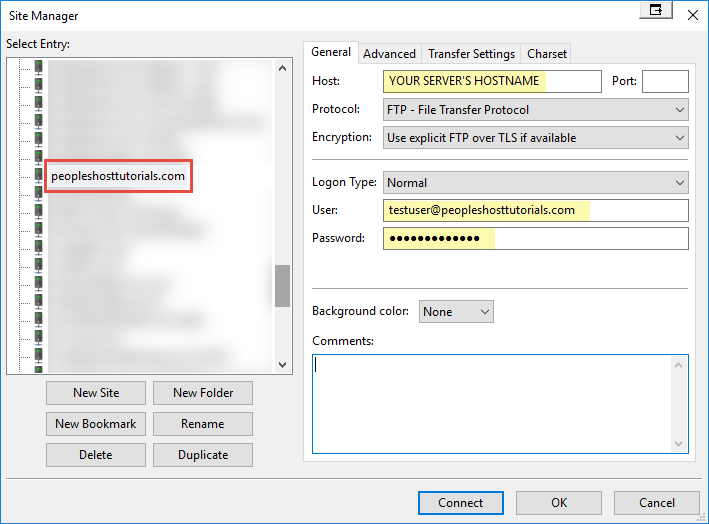
Press the Connect button to connect to your hosting account with the new FTP account.
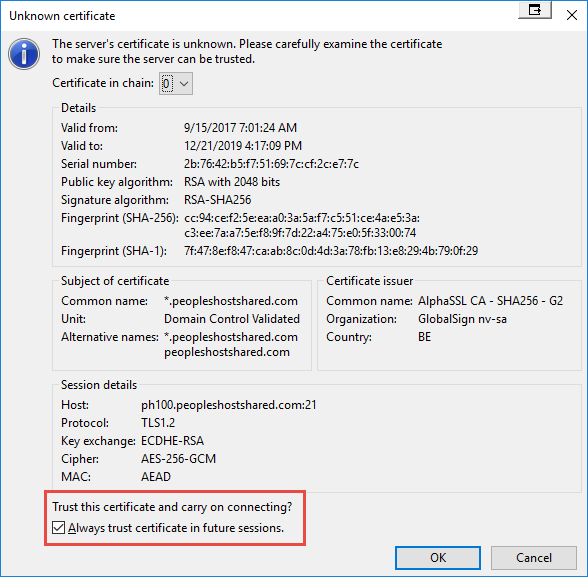
You might see another pop-up appear for Unknown certificate. You’ll want to check the box for Always trust certificate in future sessions and click OK.
Now that you’ve successfully created and tested the new FTP account credentials you can safely pass those along to the third-party that needs access to your site’s files.


