Since you’ve arrived at this page you’re probably asking yourself one of two questions (or both!):
- Where is the hosts file located on my computer?
- How do I modify, edit, or change my hosts file?
For Windows and Mac users the process to modify your hosts file is different. You’ll want to make sure to follow the steps below. Remember, this walk through is for Windows users only.
You might also be asking yourself the question why should I edit or change my hosts file? We’ll get into that as well. By the end of this article you should have a clear understanding on how to edit your hosts file, the reason behind changing your hosts file, and what those changes do (how it affects you).
What is a hosts file?
Simply put, a hosts file is a text file on your computer. It’s an operating system file that maps hostnames to IP addresses. The location of your hosts file will depend on the operating system you’re using. This article is going to show you how to change your hosts file on a Windows machine (Mac users this doesn’t apply to you–we’ll have another article posted for you!).
How to Change Hosts File on Windows
To locate and make changes to your computer’s hosts file you’ll need to follow the steps below. Once you’ve located your hosts file you’ll want to make sure to open the file using a text editor. Windows comes with Notepad, which is perfect for this task. The animated .gif below shows Notepad++, it’s another text editor I use personally.
- Open the start menu or press the Windows key on your keyboard
- Search for Notepad or locate Notepad in Start > All Programs > Accessories
- Right click on Notepad and select Run As Administrator to open Notepad as the Administrator
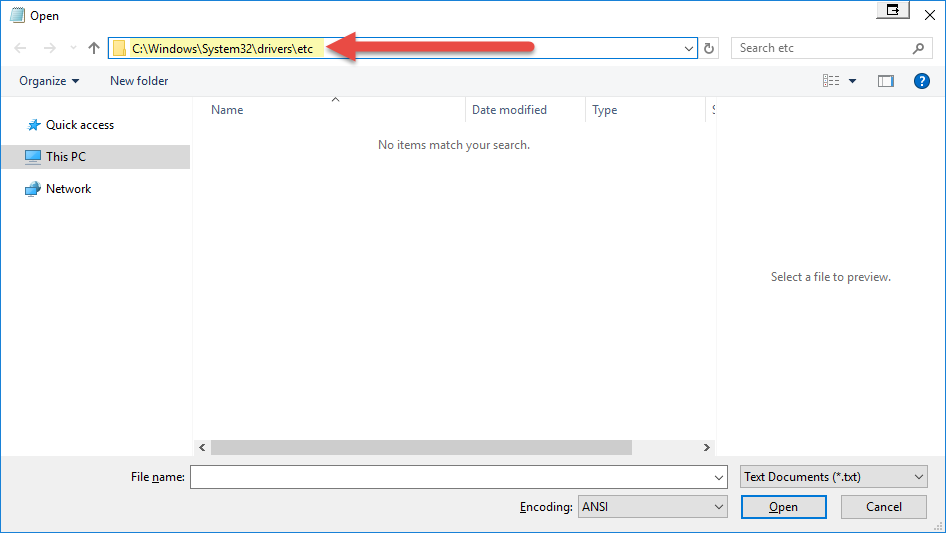
- Once opened, hit CTRL + O on your keyboard or navigate to File > Open
- Insert \C:\Windows\System32\drivers\etc into the address bar of the folder (this takes you to the location your hosts file is saved to)
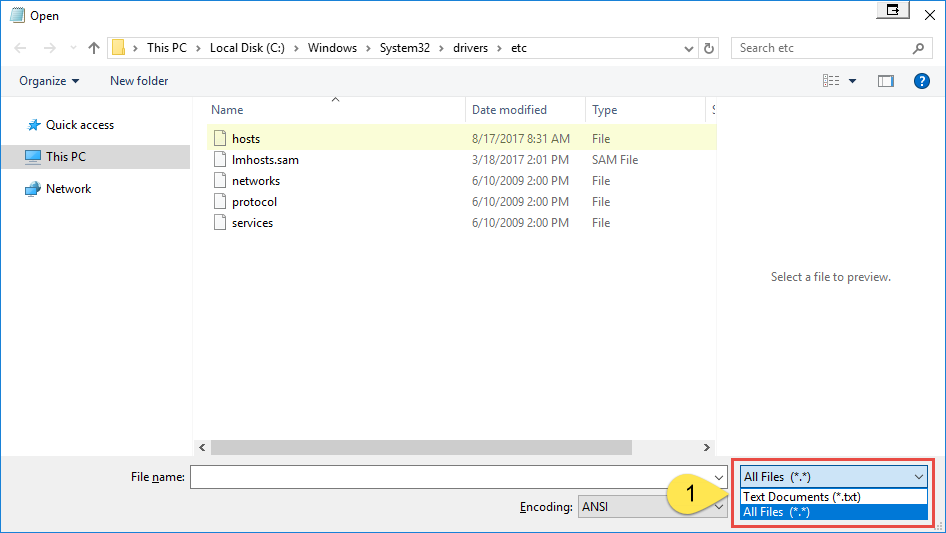
- Select All Files from the drop down
- Select the hosts file and click Open
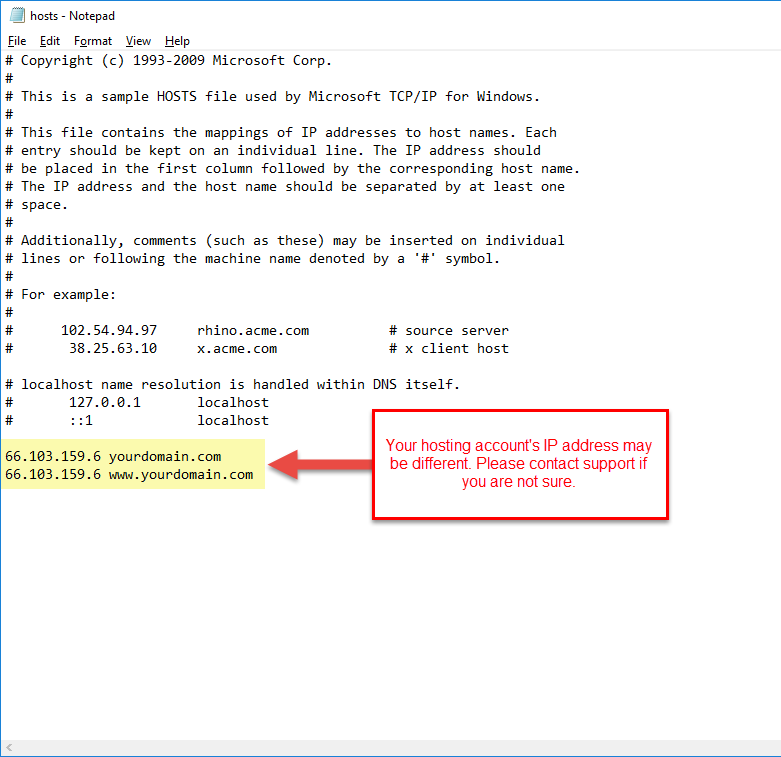
- Add your account’s shared IP address and domain into the hosts file and click File > Save or CTRL + S to save your changes

Once you’ve located your hosts file you’ll want to have your server’s Shared IP on hand so you can insert it into your hosts file. To obtain your server’s Shared IP you can contact support or access your control panel (cPanel) and view server information. Please note, the Shared IP shown in the screenshot below may be different for your account. You can find your Shared IP in your control panel (cPanel):

Now that you’ve successfully added the Shared IP and your domain to your hosts file you’ll be able to access your site as if it were live and pointing to the PeoplesHost nameservers. If you have any questions regarding this process don’t hesitate to reach out to support. We’d be more than happy to help walk you through this process.