
Outlook is a popular Email service provider that many of our customers use to connect to their email server or Outlook exchange servers. Often times we are asked how to backup emails from Outlook in certain scenarios. We’ll look at the two of the more common scenarios and walk you through step by step on how to backup your emails by exporting an Outlook Data File (.pst).
- Changing your web host or email service provider
- Changing from POP to IMAP in Outlook
- How to Remove POP Email Account from Outlook
- How to Add IMAP Email Account in Outlook
- How to Import .pst Backup File in Outlook
The process of exporting an Outlook .pst file assumes that you’re going to continue to use Outlook as your email client to access your emails after you’ve updating your mail settings to your new provider or updated your account in Outlook from POP to IMAP.
If you’re using an older version of Outlook prior to 2010, you’ll want to check out Microsoft’s support page for instructions on how to export a .pst file.
1. Changing your web host or email service provider
Depending on the web hosting provider or email service provider you’re currently using, you may not be able to migrate email accounts or emails from their server(s). This can cause an inconvenience if you have years of email stored on their server and rely on email for your day to day operations or workflow.
Fortunately, Outlook supports functionality to import and export files and settings.
In this section, we’re going to walk you through the steps on how to backup emails from the Outlook email client locally to your device.
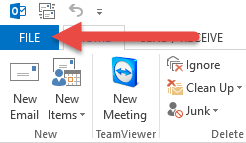
Open the Outlook client and click the File tab in the upper left corner.
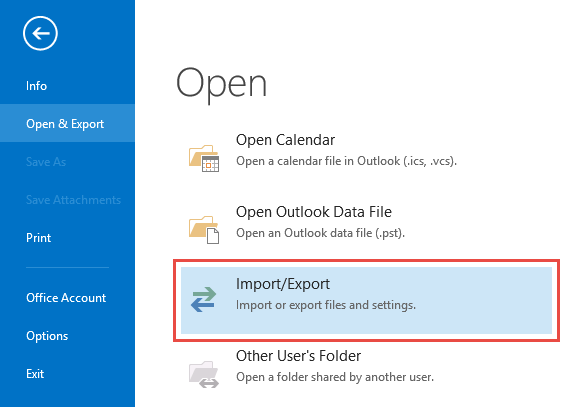
Locate the Open & Export link in the left side navigation bar. Next, click the Import/Export option.
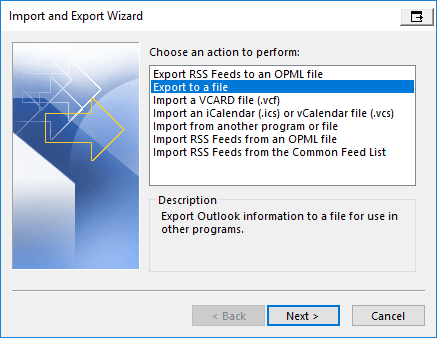
A new popup will appear.
- Choose Export to a file and click the Next button.
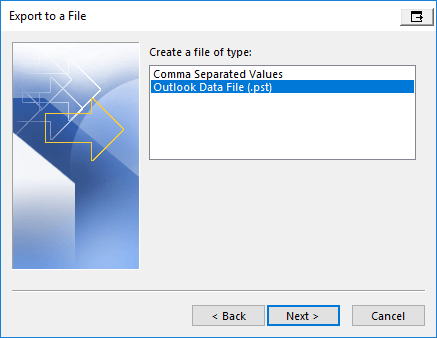
- Choose Outlook Data File (.pst) and click the Next button.
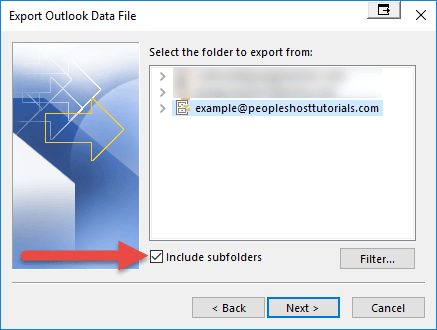
- Select your email account, check Include subfolders
- Click Browse… to select a location to save your backup (.pst) file and click the Continue button
, and click the Next button.
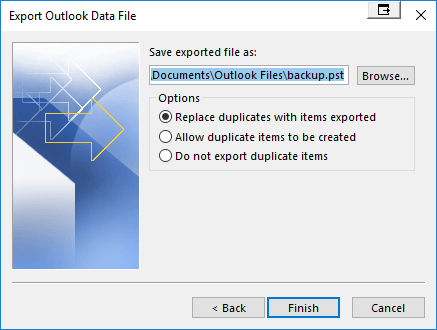
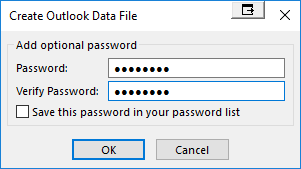
Optionally, you can choose to set a password to access the backup .pst file. If you don’t want to set a password, click the Cancel button.
Now that you’ve exported a .pst file from Outlook, you can use this backup file to import emails from that email account back into Outlook.
2. Changing from POP to IMAP in Outlook
If you have previously configured a POP email account inside of Outlook, you cannot switch the existing email account from POP to IMAP.
For example, when you go to your email account settings, you will see the Account Type: field dimmed and unchangeable as shown in the image below:
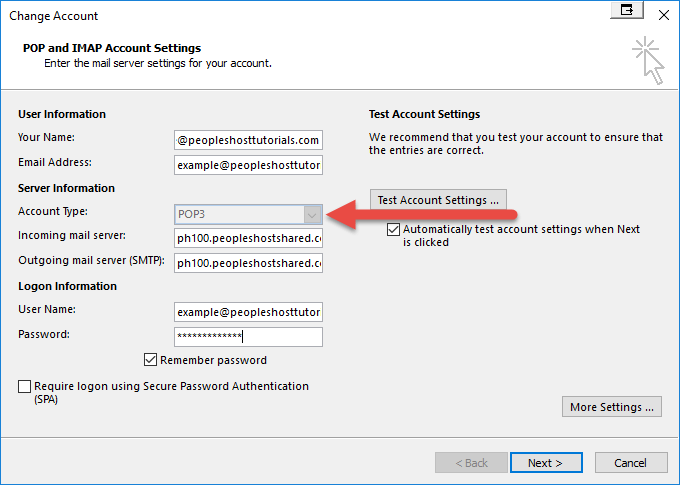
You will need to remove/delete that email account from Outlook and add it back into Outlook with IMAP selected when you configure that particular email’s account settings.
3. How to Remove POP Email Account from Outlook
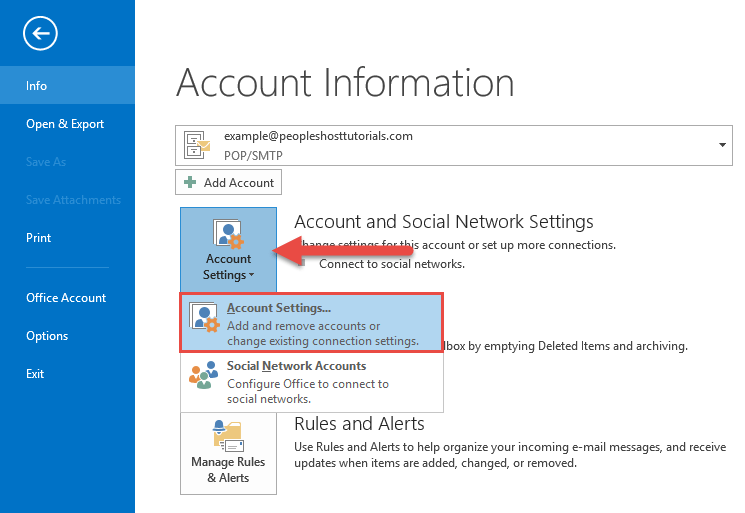
To remove your existing POP email account from Outlook, open Outlook and click the File tab in the upper left corner.

Click the Account Settings option and the Account Settings… from the drop down menu that appears. A popup window will appear on your screen.
Make sure you’re on the E-mail tab and select your email account from the list. Click the Remove button to delete the POP email account from Outlook.

4. How to Add IMAP Email Account in Outlook
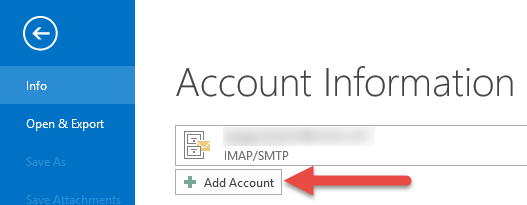
Next, you will need to add that email account back into Outlook. Click the File tab in the upper left and Add Account button.
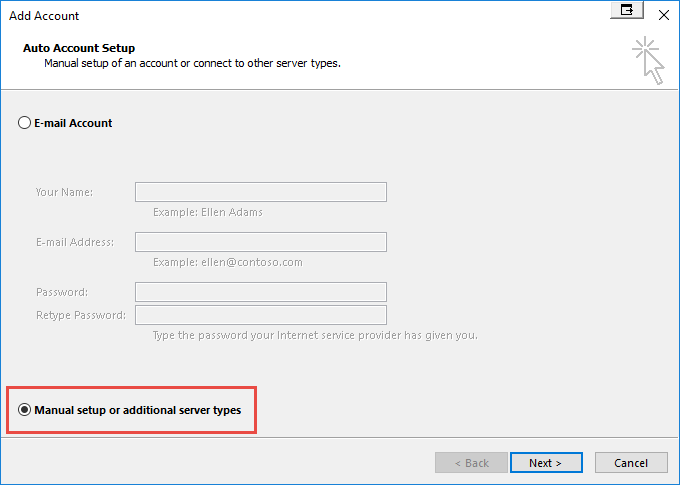
A new popup for Auto Account Setup will appear. Select the bubble for Manual setup or additional server types and click the Next button.
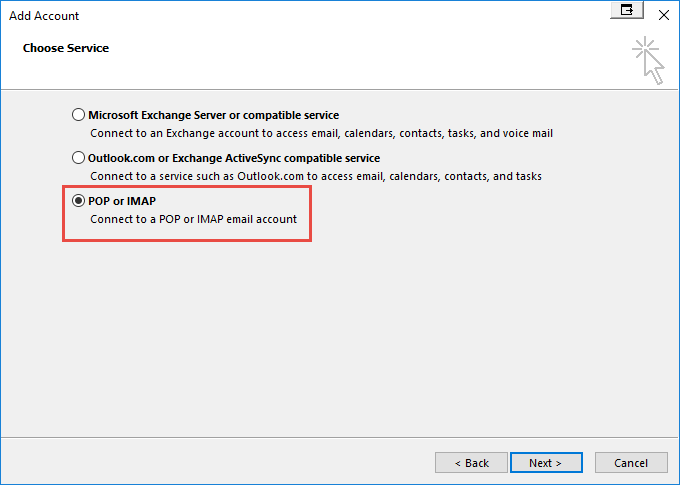
On the next screen select POP or IMAP and click the Next button.
Fill out the IMAP Email Account Settings and click the Next button. Outlook will test the connection to make sure you’ve used the correct settings.

5. How to Import .pst Backup File in Outlook
Now that you’ve added your email account back into Outlook as an IMAP email account you can restore your emails from the backup Outlook .pst file you exported earlier.
To import the .pst file, make sure to choose Import from another program or file in the Import and Export Wizard. Navigate to File and click the option for Import/Export.

This time you aren’t going to Export to a file as you did earlier in this walkthrough. Select Import from another program or file and click the Next button. On the next screen, select Outlook Data File (.pst) and click the Next button.
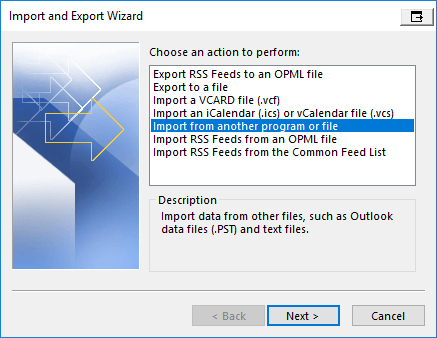
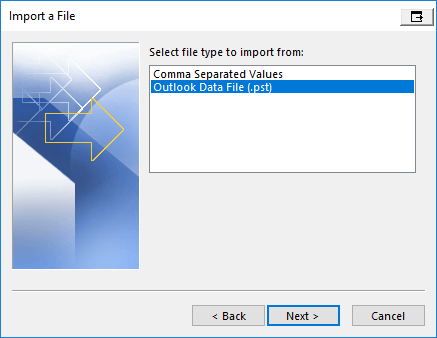
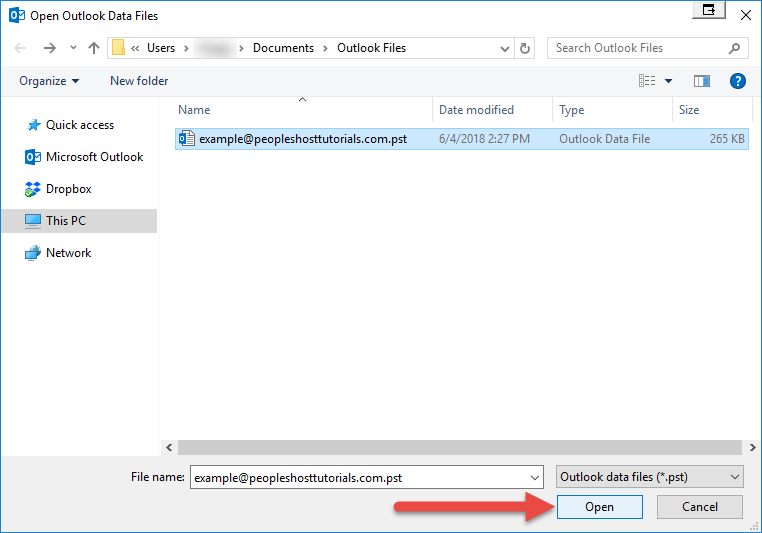
Click the Browse… button to select the .pst file you exported earlier, select Replace duplicates with items imported, and click the Next button.
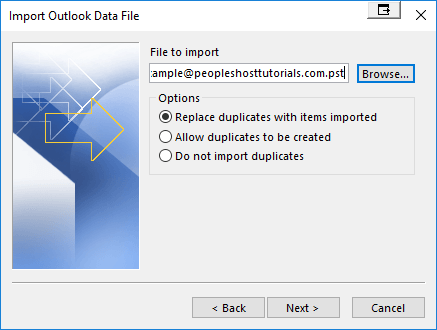
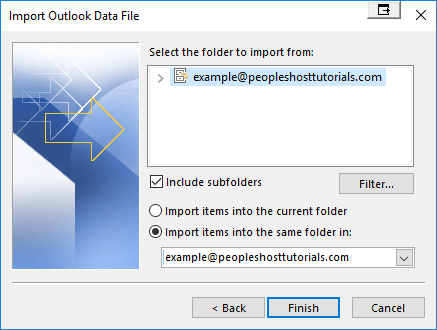
On the next screen, make sure Include subfolders is checked and Import items into the same folder in: is selected. Choose the IMAP email account you added back into Outlook in the previous step.
Click the Finish button and the emails you exported in that .pst file will be restored to the newly added IMAP email account.
If you encounter any issues trying to add an IMAP email account into Outlook or exporting/importing an Outlook .pst file, please submit a ticket and a member of our support team will gladly assist.


